Turning digital artwork into a physical product has become one of the most exciting trends in modern merchandising and branding. Among the many formats available today, the acrylic standee stands out as one of the most visually striking and versatile options. It transforms flat illustrations into vibrant, collectible displays that appeal to artists, businesses, and fans alike.
But how exactly does an artwork become a finished acrylic standee? The process involves creativity, technical precision, and thoughtful design decisions that ensure the final product looks professional and eye-catching.
What Is an Acrylic Standee?
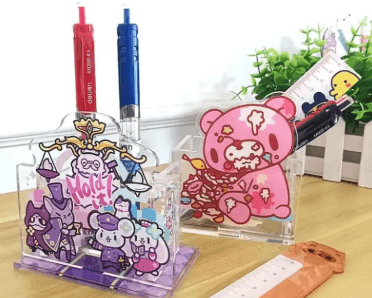
An acrylic standee is a printed display made from transparent or colored acrylic sheets, cut into custom shapes and mounted on a base stand. It is commonly used for character merchandise, branding displays, and decorative items.
Unlike paper prints or posters, acrylic standees offer a glossy, glass-like finish that enhances color vibrancy and detail. This makes them ideal for showcasing digital artwork in a physical, collectible form.
Step 1: Creating the Artwork
Everything begins with digital design. Whether it’s a character illustration, logo, or branded mascot, the artwork must be high quality to ensure a sharp final print.
Key requirements for artwork include:
- High resolution (300 DPI or higher)
- Clean outlines and defined shapes
- Transparent background (PNG format preferred)
- Proper color balance for printing
Artists often design specifically with standee production in mind, ensuring that the composition works well in a vertical or die-cut format.
Step 2: Preparing the Design for Printing
Once the artwork is ready, it is prepared for production. This step involves adjusting the file for printing accuracy and cutting precision.
Designers typically:
- Convert colors to CMYK mode for accurate output
- Add bleed margins for trimming
- Separate layers for multi-part or 3D designs
- Outline shapes for die-cut instructions
This preparation ensures that the final acrylic standee matches the original artwork as closely as possible.
Step 3: UV Printing on Acrylic Sheets
The printing stage is where the artwork becomes physical. Most modern acrylic standees use UV printing technology, which directly prints ink onto the acrylic surface and cures it instantly using ultraviolet light.
This method provides:
- Sharp and detailed image reproduction
- Vibrant, long-lasting colors
- Resistance to fading and scratches
- Ability to print on transparent surfaces
UV printing is essential for achieving the premium look that acrylic standees are known for.
Step 4: Cutting the Acrylic Shape
After printing, the acrylic sheet is cut into the desired shape. This is one of the most important steps in the entire process because it defines the final look of the standee.
There are several cutting styles:
- Character silhouette cuts
- Logo-based custom shapes
- Rectangular or standard display formats
- Intricate die-cut designs
Laser cutting machines are often used to ensure precision and smooth edges. A clean cut enhances both durability and visual appeal.
Step 5: Adding the Base Stand
Every acrylic standee requires a base to stand upright. The base is typically made from acrylic as well and is designed to match or complement the main artwork.
Common base styles include:
- Slot-in clear bases
- Printed branded bases
- Colored or themed bases
- Multi-piece decorative bases
The base not only supports the standee but also adds to its overall design presentation.
See also: Live Chat with AI Astrologer: Real-Time Guidance for 2026 Life Shifts
Step 6: Layering for Depth and Dimension
One of the most advanced techniques in acrylic standee production is layering. Instead of printing everything on a single sheet, multiple acrylic layers are used to create depth.
For example:
- Foreground character on the front layer
- Background scenery on a second layer
- Effects, text, or accents on additional layers
This technique creates a 3D illusion that makes the standee feel more dynamic and visually engaging. It is especially popular in anime merchandise and premium collectible designs.
Step 7: Quality Control and Finishing
Before packaging, each standee undergoes quality inspection. This ensures:
- Accurate color reproduction
- Smooth and clean edges
- No printing defects or scratches
- Proper alignment of all layers
A protective film is often applied during production to prevent surface damage. It is removed before final use, revealing a polished and glossy finish.
Step 8: Packaging and Delivery
Once approved, the standees are carefully packaged to ensure safe delivery. Protective materials such as bubble wrap or film layers are used to prevent scratches during shipping.
Because acrylic is lightweight yet durable, it is relatively easy to transport, making it ideal for both local and international orders.
Why Acrylic Standees Are So Popular
The popularity of the acrylic standee comes from its ability to combine art and functionality. It is not just a display item—it is a collectible, a branding tool, and a piece of creative expression.
Key reasons for its popularity include:
- High visual appeal
- Long-lasting durability
- Affordable production compared to figures
- Full customization options
- Strong emotional connection for fans
Artists, businesses, and collectors all find value in this versatile product.
Final Thoughts
The journey from artwork to finished display is a detailed process that blends creativity with technology. Every stage—from design preparation to UV printing and final assembly—plays a crucial role in producing a high-quality acrylic standee.
A well-made acrylic standee transforms digital art into a tangible, eye-catching display that can be enjoyed for years. Whether used for branding, merchandise, or personal collection, it remains one of the most effective and visually impressive ways to bring artwork to life.